In my workbench build I have used a hand-held router much more than I really want to. I like neither the noise nor the dust it creates, and above all not how incredibly quickly you can make a mistake. Instead of routing, I now always plane chamfers and roundovers on my edges. It is almost as fast, gives a better surface and it is therapeutically restful to plane beautiful shavings instead of being covered in router dust.
But when there is a lot of material to remove, as in this case with grooves for the tail vise, the front vise, the sliding deadman and eventually a lot of large mortises, there is no good alternative. The router has to come out.
I also find it hard to get an exactly even depth in a routed groove. Probably operator error, which usually does not matter much. When I routed the grooves for the tail vise rails, however, it was critical that they were exactly right. Both rails must be parallel to each other and to the opening in the top where the vise block travels. They must lie in the same plane at the right distance from the centre of the screw, and they must be the right distance apart. If all this is right, the tail vise will slide easily and work as intended. If not, it will bind, rattle and work poorly.
After carefully setting up the router, I routed both grooves successfully. The rounded ends left by the cutter were squared with a chisel and the rails fitted into the grooves. They fitted perfectly, except that all four corners of the grooves were slightly too shallow. The rails did not sit on the bottom of the grooves everywhere and were therefore not quite parallel with each other.

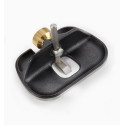
Thankfully that is easy to fix. I used my small router plane from Veritas (in Swedish it is also called “kärringtand”, the old woman’s tooth) to true up the corners. It took only a few minutes, and then the fit was perfect.
Setting the depth is simple. You hold the plane in place at a spot in the groove where the depth is correct, loosen the screw holding the iron and let it drop to the right depth. Tighten the screw and you are ready to plane. The best results come from moving the blade in half-circles rather than straight ahead. That lets the iron cut more across the grain and makes the whole thing easier.
The little Veritas plane is a good tool with one problem. The iron has a round shaft held by the clamping screw. It is hard to tighten it enough to stop the iron from twisting while planing. I have roughened the surface with coarse emery cloth, but it is still not quite right.
Now the tail vise is test-fitted, and it seems to slide nicely back and forth when you turn the handle. Happy!
The work on the top is done for a while. The next step will be making the legs and stretchers for the base.
Previous part: A Workout in the Garage. Continued: Almost Done…
Share this content