I have an old Stockamöllan bench that has really had its day. It is far from flat and full of small nails, which means it cannot be planed flat without ruining my treasures. The tail vise sags and barely holds. The front vise has been replaced with a Record 52 ½ copy from Fine Tools, which admittedly works well but needs a hefty wooden block on the moving jaw. The whole bench is rickety, too short, too narrow and the wrong height. In short: out it goes, and in comes a sturdy new Roubo-style bench.
A year ago I bought a stack of 50 mm thick beech boards that have now had time to settle properly. I have now started on the benchtop and will document the build here.
The first step is to rough-cut the boards to length. The bench will be about 210 cm long plus an end cap of about 7.5 cm, so I cut the boards to 212 cm plus a random allowance. Then they were jointed and thicknessed to a width of 11 cm and as thick as the material allowed. Most are between 4.5 and 5 cm thick. This was done on my Hammer A3/31, as I am not crazy enough to do it by hand. The planing filled one and a half sacks of shavings.
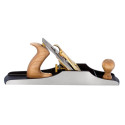
To get a good glue joint, I planed the mating surfaces with my Lie-Nielsen 5 ½. The edges should be smooth and flat, or better still slightly concave. A concave edge makes the joint tight and neat where it shows. How do you achieve that? Simple: by taking one or two extra strokes in the middle of the board you get a suitable shape. I measured with a feeler gauge and saw that the gap is between 0.05 and 0.1 mm. That is enough for the edges to close tightly and little enough to press the pieces together with clamps.
I planed two surfaces and glued them together. When the glue had dried I planed one surface on the glued-up package and one surface on the next board. On with the glue and clamp the next board. After a couple of days I had two packages of five boards each, about 25 cm wide apiece.
The next step is to joint and flatten the packages and glue up the top. I just need to recruit a strong neighbour as a helper first… I will be back with updates as I go.
Share this content